Most of
today's commercially available sauerkraut is clinically "dead” as a result
of pasteurization.I like sauerkraut
that is alive and tangy and has all the beneficial bacterial cultures that make
it healthful to Our bodies.
How I Make: Sauerkraut
(German for “Sour
cabbage”)
Items and Ingredients needed:
1 Gallon-size glass jar
with opening big enough to put hand inside jar.
If
you do not have one of these, some people use a small crock, plastic
container, or plastic bucket.
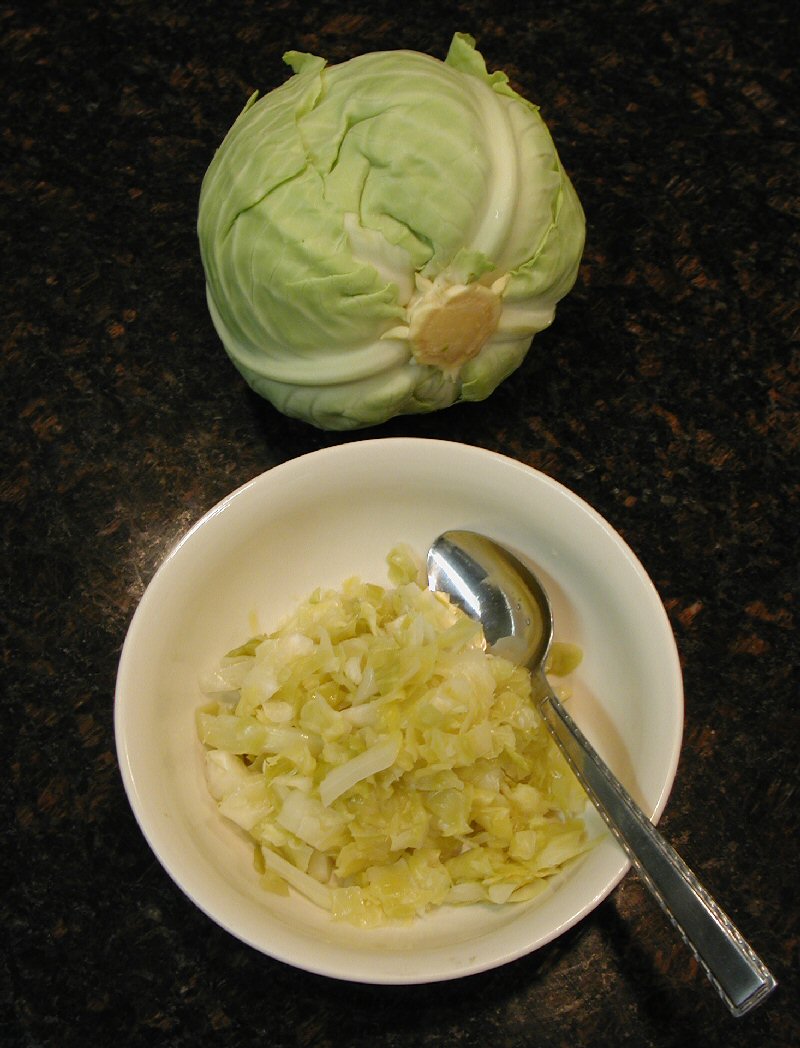
Two to four heads of fresh cabbage.Light green to white variety.Two, if they are extra
large heads of cabbage, 3 if medium size heads, or 4 if really small heads
of cabbage.Some people add purple
cabbage for color.
Two tablespoons Table Salt or equal.Should not have
additives such as fluorine, iodine, anti-caking agents, etc.
Process:
Wash cabbage
thoroughly and chop up or grate into pieces in sizes not more than ½” wide
by not more than 1½” long.
Sprinkle salt over
the cabbage and spread by mixing the salt into other areas of the
cabbage.The salt pulls water out
of the cabbage (through osmosis), and this creates the brine in which the
cabbage can ferment and sour without rotting.Not having enough salt or brine will
prevent desired results and having too much will be too salty to the
taste.Use your judgment.If the cabbage is on the dry side, you
may want to sprinkle a little bit of water before mixing in the
salt.
Place cabbage into
glass jar and press firmly into place without breaking the jar.Tamp it down hard using your fists or
any sturdy kitchen implement. The cabbage is to remain moist by its own
juices or the salt brine created thereby.
After cutting up all
of the cabbage and placing it tightly into jar, place a piece of clear
plastic over the top surface of the cabbage to keep the pieces of cabbage
from drying out.Let jar with
cabbage sit out on the counter for about a week or two.As fermenting gases form, occasionally
press cabbage firmly to keep moist and air out between layers.Do not cover jar with lid unless left
loose to allow gasses to escape.If the lid is on tight, the jar could explode as result of the gases
being created by the fermentation process.Eventually you will notice that some of
the cabbage, especially on the bottom of the jar will start turning
yellow.This yellow color is what
you want to see.That means that
the process of fermenting is taking place.
After the entire
cabbage in the jar becomes yellowish color, you can place in refrigerator
and start eating it after it has cooled down.Some of the very top surface material
that is not yellow can be removed and thrown away.Take out of the jar that portion you
want to taste and or consume and place the remaining material back into
the refrigerator.Repeat until all
is consumed.Be sure to cover the
surface of the cabbage each time cabbage is removed and always repack by
pressing the cabbage firmly to the bottom to avoid dehydration.Refrigerated sauerkraut will last a few
months.
Let Me
know about your experience with sauerkraut and if this information has helped you.
Cook Street School of Fine Cooking offers an accelerated Professional Food & Wine Career Program, recreational cooking and wine classes for students of all skill and experience levels.
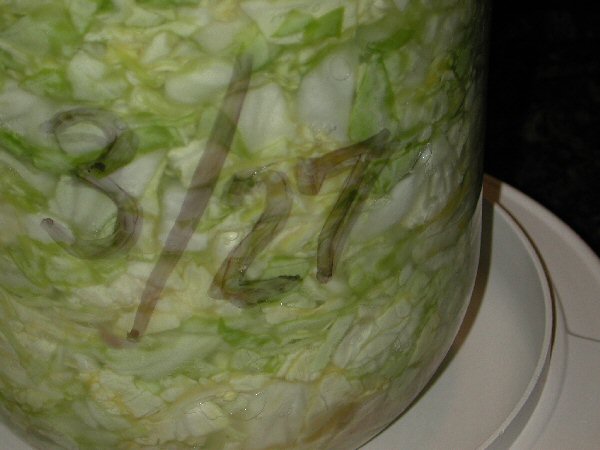
Sauerkraut made on the Twenty-seventh day of the Third month, anno Domini Two thousand seven.
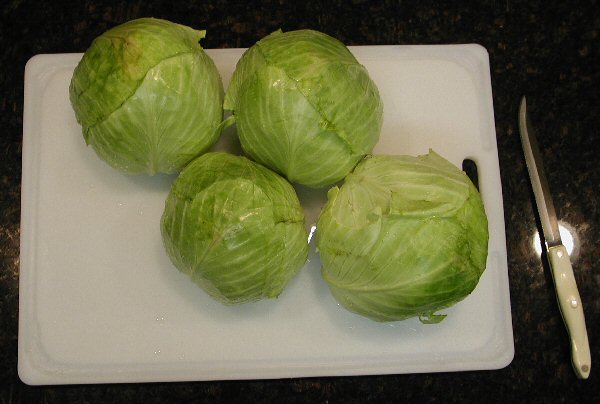
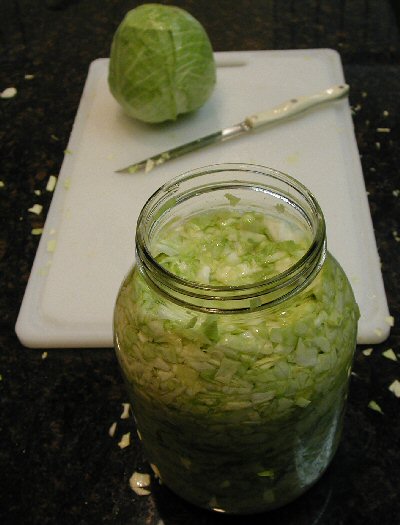
I bought 4 cabbages and washed them.
They measure about 6" in diameter and all 4 together weight 11.20 pounds.
The cutting board measures 20" x 14"
The knife is made by Cutco.
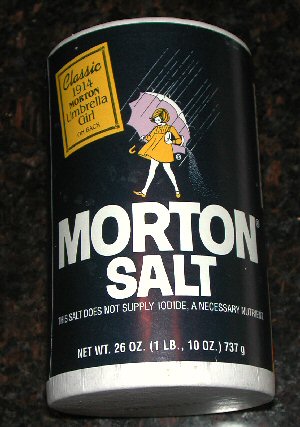
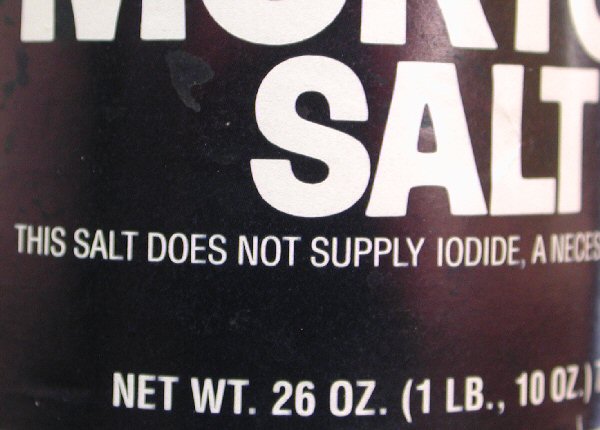
I used almost 2 tablespoons of table salt.
The label states that there is no Iodine in the salt.
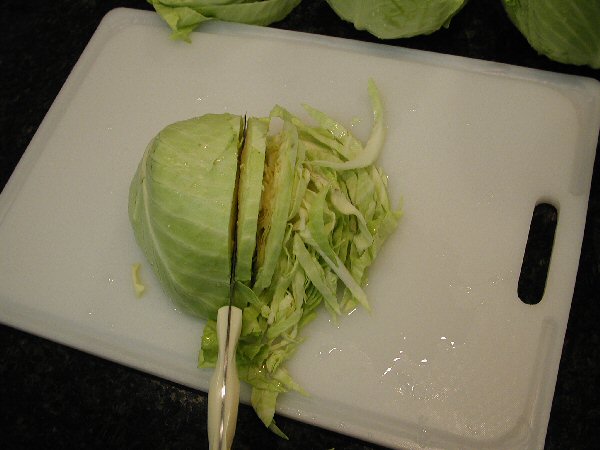
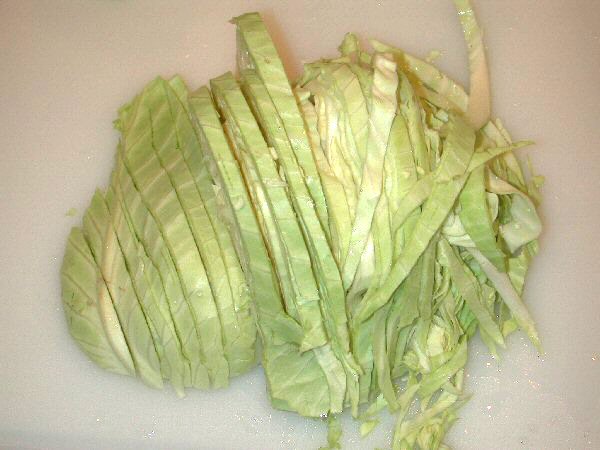
I cut the cabbage into two halves.
One of the halves is placed on the board with cut side down. Parallel cuts are made and spaced approximately 1/4" to 3/8" apart.
I make all of the parallel cuts first before turning the cabbage or board perpendicular.
Now I make parallel cross cuts about 1/2" to 1" apart.
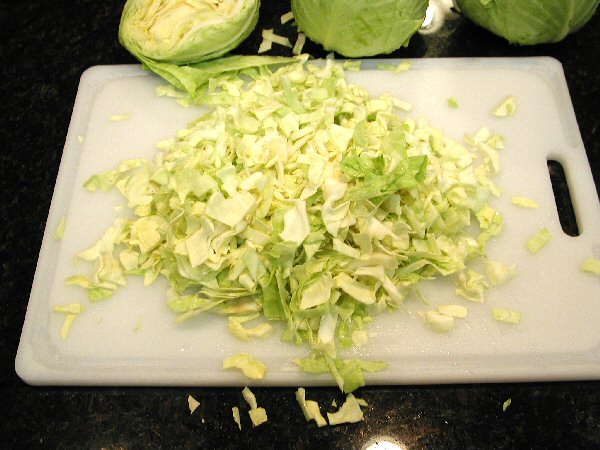
Now I sprinkle in the salt and mix thoroughly right on the cutting board.
There are different ways to mix in the salt but I scoop up from the edges and turn handfuls of cabbage in toward the center areas.
Sometimes I will add more salt and repeat the process.
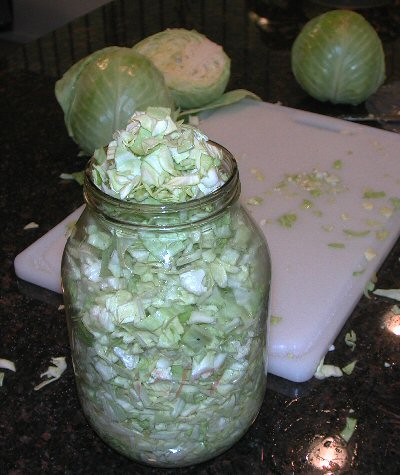
I collect handfuls of the cabbage and place into the gallon size jar.
After I clear the cutting board of the cabbage I press the cabbage in the jar with My hand.
I repeat the process for each half of cabbage.
There are three halves in the jar so far and it is half full after pressing down tight.
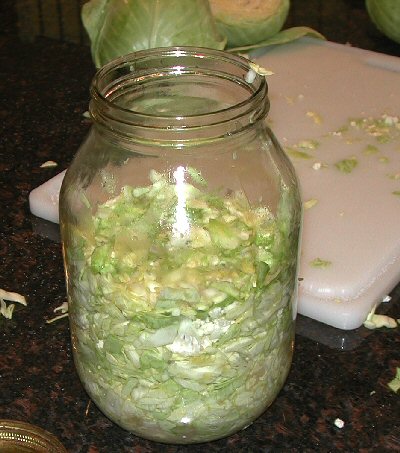
After cutting three heads of cabbage and pressing the cabbage tightly into the jar, I have one cabbage left over.
I only needed three 6" diameter cabbages to completely fill My gallon-size jar. Roughly, about 8 pounds total.
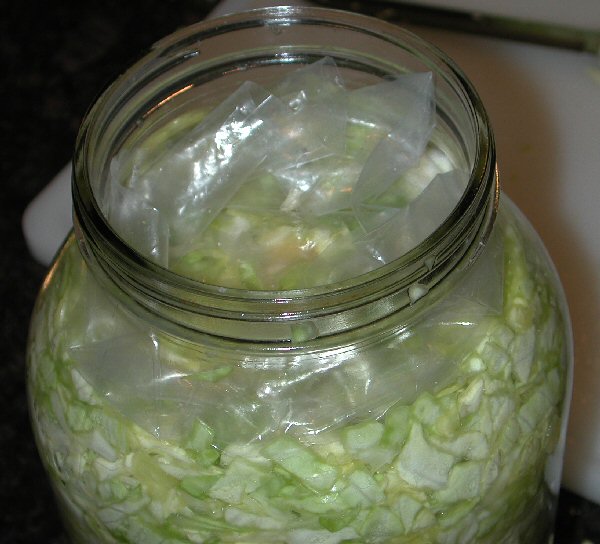
I cut out and use a 10" diameter piece of plastic to cover the cabbage.
The piece of plastic is pressed into place over the cabbage and up against the jar to seal off as much air as possible.
The outside of the jar is cleaned up.
The jar is placed over a container to collect any overflow.
To prevent bugs or any other contamination, the jar lid is placed over the top but is loose and not secure.
A felt-tip marking pen is used to put the date on the jar.
This time, I mixed in some sauerkraut from the previous batch to hasten the fermentation process.
Also, about half way through the process of adding the cabbage to the jar,
I put some cauliflower in with the cabbage to try out.
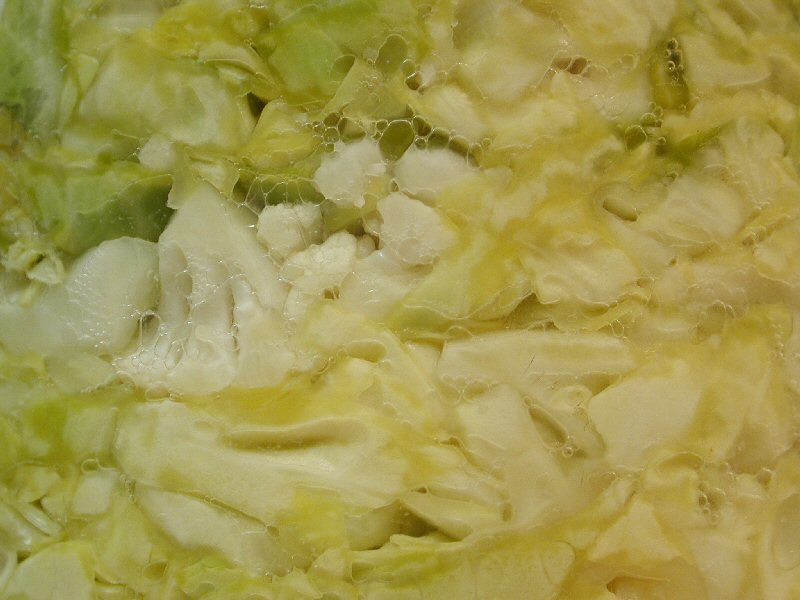
A lot of bubbles occur during fermentation process which causes the cabbage and brine to rise.
I used a wooden spoon to push the cabbage downward thereby releasing the bubbles to the surface.
This is done to prevent it from going over.
Click on this photo to enlarge and take a look at the bubbles formed from the fermentation process.
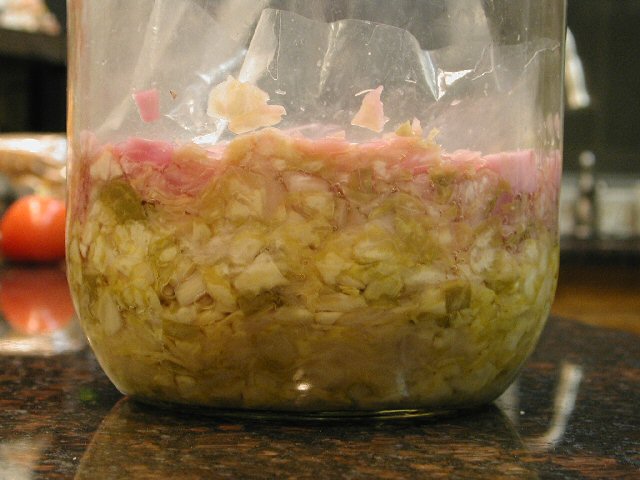
Note that the color of this batch is turning yellow.
This rich yellowish color indicates that the sauerkraut is ready to eat and needs to be refrigerated.
This batch was put in the refrig on the third day.
After being in the refrig, the bubbly action slowed considerably and the brine receded to lower levels.
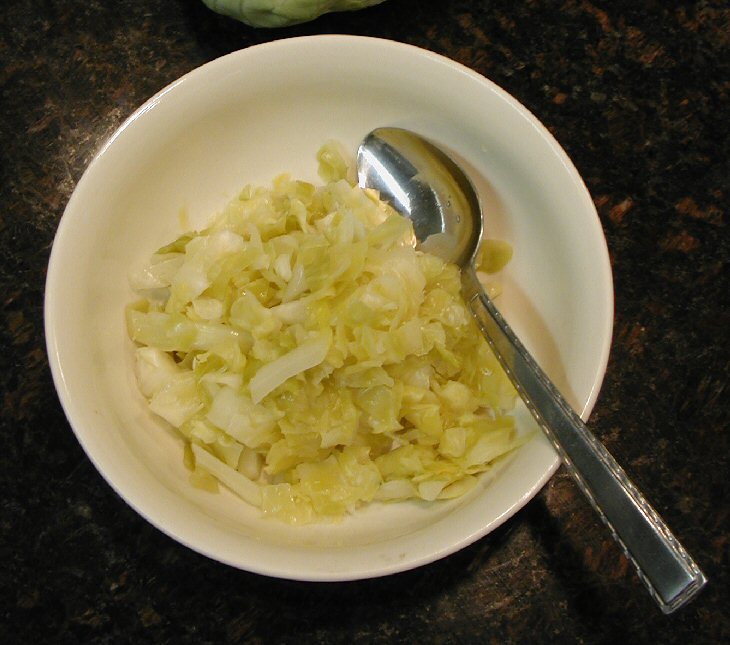
The sauerkraut is now ready to eat.
Wow! That was great!
I took these photos after eating about 3/4 of a previous batch of sauerkraut.
The pinkish color is from the red cabbage added for color.
Click on button to send email:
Since The First day of the Fourth month
anno Domini Two thousand seven
Your visit counts as number

 Cabbage made into tasty Sauerkraut